
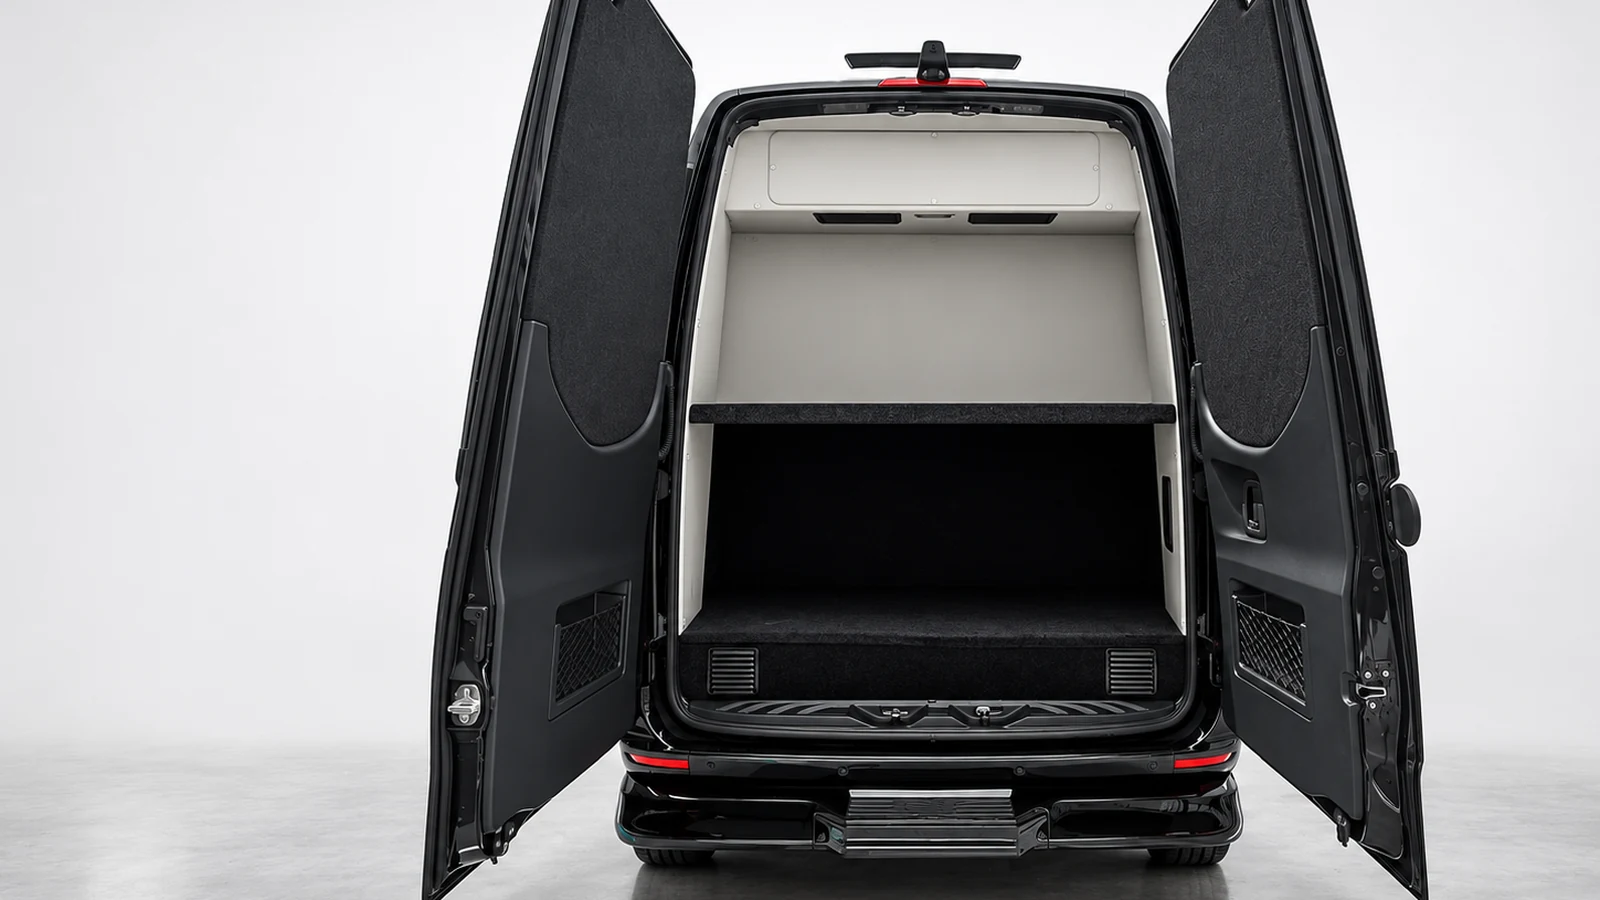
Illustrative Dufourfun inventory photo showing rear-door and cargo access. No rack, tire carrier, storage box or hitch has been added, and the image is not an accessory fitment recommendation.
The back of a luxury van has to do several jobs at once. It may provide cargo access, rear-door openings, camera visibility, lighting, a step or bumper surface, and space near a bathroom or storage cabinet. Adding a spare tire, box or rack can change that balance. A useful custom-build decision starts with the exact vehicle and travel routine, not a universal accessory claim.
Compare four rear-zone approaches
Each approach can be reasonable in the right documented configuration. None should be assumed to fit or carry a particular load without chassis, VIN, upfitter and accessory documentation.
| Approach | Potential reason to consider it | Main tradeoffs to investigate |
|---|---|---|
| No external carrier | Keeps the rear zone simpler and avoids adding an external accessory | Where the spare and travel gear are actually carried, available interior space and total payload |
| Full-size spare carrier | Keeps a matching full-size spare accessible without using the same space as packed luggage | Door swing, tire size and load rating, carrier security, camera or sensor effects, lights and plate visibility |
| Hitch storage box | Provides an enclosed place for suitable gear outside the cabin | Hitch and tongue ratings, box and cargo weight, vehicle length, rear access, weather exposure and security |
| Gear or bike rack | Carries specific equipment shaped for a rack system | Equipment retention, rack and hitch ratings, lights and plate visibility, rear access, length and repeated inspection |
A carrier's own rating is not the whole answer. The vehicle, hitch, attachment points, accessory and cargo all need to be considered together. The lowest applicable documented limit matters, and the total vehicle load still includes passengers and everything else on board.
Start with rear doors and interior access
Open both rear doors through the range you actually need. Note where a proposed accessory would sit at each position, including when the doors are nearly closed and fully opened. A solution that works only when a door is partly opened may be frustrating during daily loading.
Then look through the rear opening rather than focusing only on the exterior. Consider these questions:
- Does the conversion place a bathroom, cabinet, drawer or fixed panel behind the doors?
- Does luggage need a flat loading path or a particular opening height?
- Would a carrier or rack require unloading before a door can move?
- Can a passenger reach the needed area without standing in an unsafe traffic position?
- Will the routine still work at night, in rain or with a tired group?
The hero image is useful only for thinking about door and cargo access. It does not show that a carrier would clear those doors, and it does not establish a hitch, payload or tire specification.
Check what the driver and others need to see
A rear accessory may affect a camera, parking sensor, lamp, reflector or license-plate view. Effects depend on placement and the exact equipment, so inspect the complete vehicle rather than assuming an accessory category always clears them.
- Test the camera view with the accessory installed, if a documented demonstration is available.
- Ask how any parking sensors behave and review the vehicle instructions.
- Check that required lights, reflectors and the license plate remain visible and compliant with applicable rules.
- Do not treat a camera as a replacement for a safe maneuvering routine or a pre-drive inspection.
Mercedes-Benz offers owner manuals for vehicle-specific operating information. Conversion and accessory documentation may add instructions of their own.
Use documented limits, not a generic Sprinter number
Mercedes-Benz describes its Body and Equipment Guidelines for Sprinter modifications as technical specifications and limitations for vehicle modifications. Its upfitter portal is the broader starting point for that technical information. Mercedes-Benz also states that upfitters remain responsible for applicable law and regulation.
For a buyer, that means a sales description is not enough. Request the documentation chain for the exact chassis, conversion, hitch if present, carrier or rack, and attachment method. Ask who performed the work and what instructions apply after installation.
Do not rely on a universal Sprinter towing, tongue-weight or payload figure. Model year, configuration, equipment and the completed conversion can change the relevant limits. Add the accessory and its contents to the load calculation rather than counting only what is inside the cabin.
A full-size spare needs its own verification
The phrase full-size does not by itself prove that a spare matches every requirement. Check the tire's size, construction and load rating against the vehicle documentation, along with wheel compatibility and the carrier's documented capacity. Tire age, condition and correct cold pressure also deserve attention.
NHTSA's tire guidance directs drivers to the owner manual or Tire and Loading Information label for the correct tire size. Its summer driving tips advise checking tire pressure monthly when tires are cold, including the spare. Use the exact vehicle's recommended pressures rather than a number printed as a generic accessory suggestion.
A spare carrier can also affect rear access and the areas discussed above. A spare stored elsewhere can affect interior space and total payload. Neither location is automatically the right choice.
Length, departure angle and everyday maneuvering
An external box, rack or tire can change the vehicle's rear profile. Measure the complete arrangement rather than relying on the van's nominal body length. Consider the places you actually use: home parking, hotel arrival, ferry or garage rules if relevant, and normal reversing.
Departure angle and ground clearance deserve a real-world review on driveways and transitions you encounter. Do not intentionally test a loaded accessory on a steep obstacle. Ask the upfitter or accessory provider for documented clearance information and inspect for contact after ordinary use.
Security is another repeated-use issue. Review locks, attachment points and what can be accessed when the vehicle is unattended. A lock does not make valuable gear immune to theft, so decide what should remain inside or travel with you.
Put inspection into the ownership routine
- Before a trip: Inspect the carrier, fasteners, attachment points and visible wiring where applicable, following the relevant instructions.
- After loading: Confirm retention, door operation, camera view and required light and plate visibility.
- During travel: Use the accessory manufacturer's inspection guidance rather than inventing a universal interval.
- After rough roads or contact: Stop safely and arrange an appropriate inspection before assuming everything remains secure.
- Over time: Record maintenance, replacement parts, tire checks and any change in equipment.
Questions to settle in a custom-build brief
| Decision | Evidence to request before approving it |
|---|---|
| Exact rear-zone purpose | Your passenger, luggage, spare and gear priorities |
| Chassis and completed conversion | VIN-specific documentation, build details and applicable guidelines |
| Hitch and accessory | Manufacturer instructions, ratings, attachment method and installer details |
| Spare | Size, load rating, wheel compatibility, condition and pressure guidance |
| Doors and visibility | A physical demonstration of access, camera behavior, sensors, lamps and plate view |
| Total load and dimensions | Documented weight and complete vehicle measurements for the proposed setup |
| Ongoing care | Inspection, maintenance, security and warranty instructions |
Bring those priorities to the custom van builder as questions, not as a presumed parts list. If you are comparing existing vehicles instead, browse vans for sale and inspect the exact rear zone. No particular accessory is recommended here, and no fit or capacity should be inferred from a photograph.
The best rear-zone plan is the one supported by the exact documentation and demonstrated in the way you will use it. Convenience at one stop is not enough if it compromises access, visibility, loading or inspection on every later trip.
Image credit
Original stored source: Midwest G55 open-rear-door inventory photo. Creator: Dufourfun Vans, with no named photographer documented. Usage basis: business-owned inventory image in the site-controlled Dufourfun media library. Transformation: EXIF orientation normalized; crop rectangle [0, 135, 1449, 950] from 1449 by 1086 pixels; Lanczos resize to 1600 by 900; WebP quality 88. The resize involved a modest upscale. No generative editing, accessory addition or vehicle alteration. This is an illustrative rear-access photo of the actual inventory vehicle, not a fitment, capacity, tire-rating or accessory recommendation.